GMTasksAndTriggerLinks
Arma Reforger mod — what you can do · version 2.1.56 · Version française
Build a mission from the Game Master interface, then play it. You place your objectives and your units, you give them their orders, and you place zones that trigger what happens next.
It all comes down to two ideas. Any entity can be given a
logic ID with a right click — a code such as GTLABCD. Everything
else hangs on it: a zone names what it watches and what it acts on through these IDs. No game
prefab is modified, and nothing is written in script: everything is set in the Game Master
panels.
The menus and settings are quoted as they appear when the game runs in English. Screenshots are still from the French version for now.
What's new in October (2.1.40 to 2.1.56)
- Cinematic module: a mission intro or a filmed sequence, where the players' view moves from one camera to the next with music, a title and a subtitle. Details.
- "Who reads the message" replaces the "Global message" box on interactions, with a third choice: Nearby players, a speech bubble above the speaking entity. An unticked box becomes "The player who acts", a ticked box "All players": your missions do not change. Details.
- "Turn on the targeted screen": a trigger and multi-action action that lights a screen just like pressing its "Turn on". "Show the camera on this screen" is now called "Show the targeted camera". Details.
- "Spotted by AI (in the zone)" condition and "A player is spotted" template: the zone only counts what an enemy AI sees right now. Details.
- A trigger fires anything that can be fired: with "Fire the targeted module", it now directly plays an entity's interaction, a task list or a cinematic — no multi-action needed in between.
- The countdown applies to everyone: a trigger set to "Countdown" waits for its delay even when another trigger, an interaction or a multi-action fires it. Before, it went off at once. If one of your missions relied on that immediate start, set the trigger back to "Immediate".
- Ready-to-play missions: a GTL mission can be published as a scenario mod. Players download it, start the scenario, and the mission rebuilds itself. Details.
- Autosave history: GTL keeps the latest autosaves (3 by default), and a "Save systems" button shows what really saves on the server. Details.
- One rule for every module: "Enable / Disable" makes a module active or inactive, "Fire" makes it play. Multi-action, task list and mission end modules now have their own "Module enabled" box. Details.
- 1 m zones: the radius now goes down to 1 m, and a character must stand inside the circle itself to trigger it. Details.
- Arrival radius on the GTL waypoint: the group stops at the centre of the point instead of 5 m short of it. Details.
- Missions carry their outfits (wardrobes and the AI using them), and copied groups keep their template's outfit, even after respawning.
- Fixes: ID lists showing the wrong entity, GTL modules missing from the entity browser with some mods (AMF…), a faction (AMF's FR) coming back as US after loading, other mods' markers captured by missions, persistent scene still movable right after saving. Save your missions again: that is what stores the right faction, adds the outfits and removes other mods' markers.
- Spawn any entity: right-click an entity, including one from another mod or a support module such as smoke → "Add to spawnable entities". A zone can then spawn it at its centre. Details.
- Move the player here: a zone action that carries the triggering player — or their vehicle — to the centre of the zone, without giving them an ID. Details.
- Autosave: the game in progress is saved separately, along with the game's own save or every N minutes, and resumed when the server restarts. Details.
- "Find duplicates" tool in the GTL Missions tab, with a confirmation window. Details.
- Game persistence (vanilla) and GTL missions: entities recreated by a GTL load are no longer duplicated when the server also uses the game's own save.
- Self-contained missions: a mission file now carries its texts (tasks, briefings, interactions, menus) and the list of mods it uses. Copied to another server, it comes back complete, and a missing mod is named on loading.
- Compositions: a composition (arsenal, camp…) comes back whole on loading instead of falling apart into separate pieces. Save the affected missions again once.
- Clearer ID lists: the latest placed entities first, the object's name next to its type, and an optional name or pin. Details.
- Persistent scene: visible to players anywhere on the map, and saved in two steps with a preview of what will change. Details.
- Everything is translated: context menus, writing windows, messages and access card follow each player's language.
What's new in September (2.1.28 to 2.1.39)
- Spy icon: with "Disguise fools the AI", a player wearing an enemy outfit sees an icon in the top right corner. Once unmasked, it disappears; it comes back if no AI of the imitated faction has seen them during the "Delay before the disguise returns". You cannot put on a disguise under the enemy's eyes. Details.
- Respawn on an out-of-combat player: a new box in the GTL Rules tab, to be combined with the game's "Respawn on players" setting. You only respawn on a teammate who has not fired, not been hit and not been seen by any enemy AI during the calm delay (15 s by default). Otherwise their spawn point is greyed out in the deployment menu.
- Mission map markers: place your markers in character with the game's tool, then right-click empty space → "[GTL] Lock my map markers". They become mission markers: players can no longer erase them, they stay after you disconnect, and they are saved with the mission.
- Escort catches up automatically: an AI following you that ends up more than 100 m away for 10 s is put back behind you, or seated straight into your vehicle (never behind the wheel).
- Interaction with an AI in a vehicle: you trigger it standing next to the vehicle; its action waits 3 s, giving you time to get in before the driver sets off.
- Chained interactions: an interaction's "Zone or module to fire" list now also offers stand-alone interactions and the Mission end module. A dialogue moves on to its next line without an intermediate zone (an A → B → A loop stops by itself).
- Charcoal wall notice board: a variant of the text board with a grey frame, written the same way.
- Translated messages: messages shown to players (doors, access cards, countdowns…) follow each player's language, French or English. Text written by the Game Master is shown as is.
- Routes: a route given by a zone survives a mission reload; a finished one-way trip is not replayed. No more stacked orders or duplicated waypoints.
- Briefing: entries no longer vanish from the journal when players move away. Gathered intel is cleared when the scenario is cleaned up or a mission is loaded.
- Screens: dark blue when idle instead of white, and the "Turn on" interaction no longer goes missing after a reload.
- Text box: properly centred on screens larger than 1080p.
- Properties panel: an object carrying an interaction no longer shows "Repeatable" twice: everything is set in its Interactions tab.
Assigning an ID
Right-click any entity — a soldier, a group, a vehicle, a crate, a door — then "ID GTLXXXX (assign a new one)". The entity can now be referenced by the rest of the mod. The ID shows in the tooltip when you hover over the entity in 3D view, and on the Game Master map.
![An AI's context menu with the [GTL] entries](doc_GTL/shot_menu_contextuel.jpg)
An entity with an ID is also protected from the game's automatic clean-up: it will not disappear because players moved away. It is a cornerstone of your scenario, so it has to stay in place.
The mod's modules do not need this right click: zone, task, briefing, interaction, camera, screen, door lock, multi-action and task list get their ID as soon as you place them, because they cannot work without one. Ordinary AI, groups, vehicles and objects only get one if you ask for it — otherwise the target lists would be flooded with hundreds of useless entries.
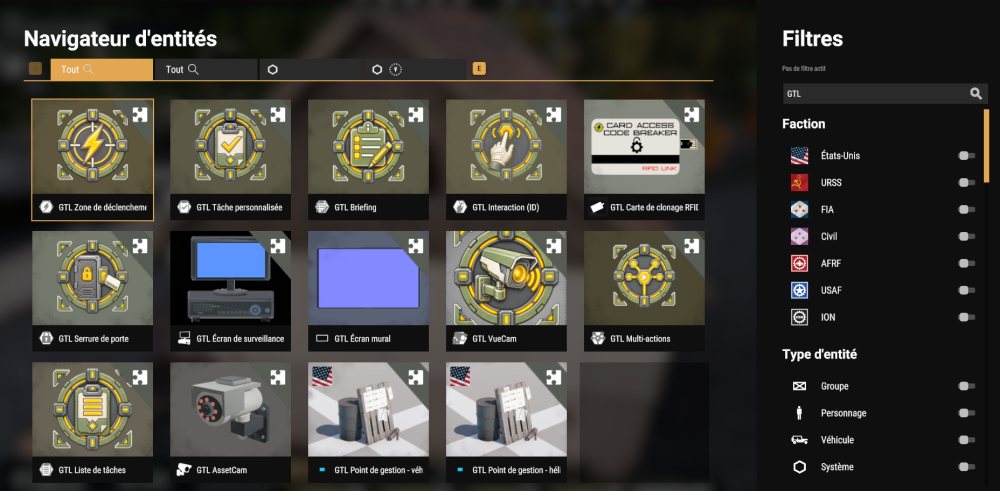
GTL in the entity browser: every placeable module of the mod shows up at once.In the drop-down lists, each ID is followed by what it refers to —
GTL5UK3 - Screen, GTL9KCJ - AI: Rifleman — so you cannot pick the wrong
target. For ordinary entities (AI, vehicle, item), the object's name follows its type. The most
recently placed or edited entities come first.
Two right-click options, offered on any entity with an ID, make the lists even easier to use:
- [GTL] Name the entity…: a name of your own, shown in every list —
GTL5UK3 - AI: Gate guard. Leave it empty to clear it. - [GTL] Pin to the top of ID lists: the entity moves to the top of every list, marked with an asterisk.
Names and pins are saved with the mission.
Every module has a Basic settings tab holding its ID, the Module enabled box — a disabled module does nothing, and a zone or an interaction can switch it back on during the game — and the Repeatable box.
One rule for every module: Enable / Disable makes it active or inactive, Fire makes it play. An inactive module ignores being fired. The zone action "Enable / Disable the targeted module" works on zones, interactions, GTL waypoints, multi-actions, task lists and mission ends. The right-click [GTL] Fire now also works on the multi-action — but not on the mission end, which one unlucky click would be enough to finish.
Example. You give an ID to the group guarding the bridge. A zone placed at the village entrance can then wake it up, without you having to find that group in a list.
Duplicating an entity
Right-click a placed entity → [GTL] Duplicate: a copy sticks to the cursor, with the same settings and the same texts, and you drop it wherever you like. The copy always gets a new ID: it is never mixed up with the original.
This works for a configured zone, a written task, a multi-action and its entries, an interaction, just as for an ordinary object. Esc cancels.
On a GTL waypoint, the copy is automatically chained after the original: place the first point, set it up, then duplicate the last link as many times as needed to draw the route.
Example. You have fine-tuned an ambush zone. Three duplicates later, all three crossroads on the road are covered.
Placing a trigger
The zone is the heart of the mod. It watches a condition and plays an action. Its panel is laid out in three tabs that describe the zone in order: the zone itself, what fires it, and what it does.
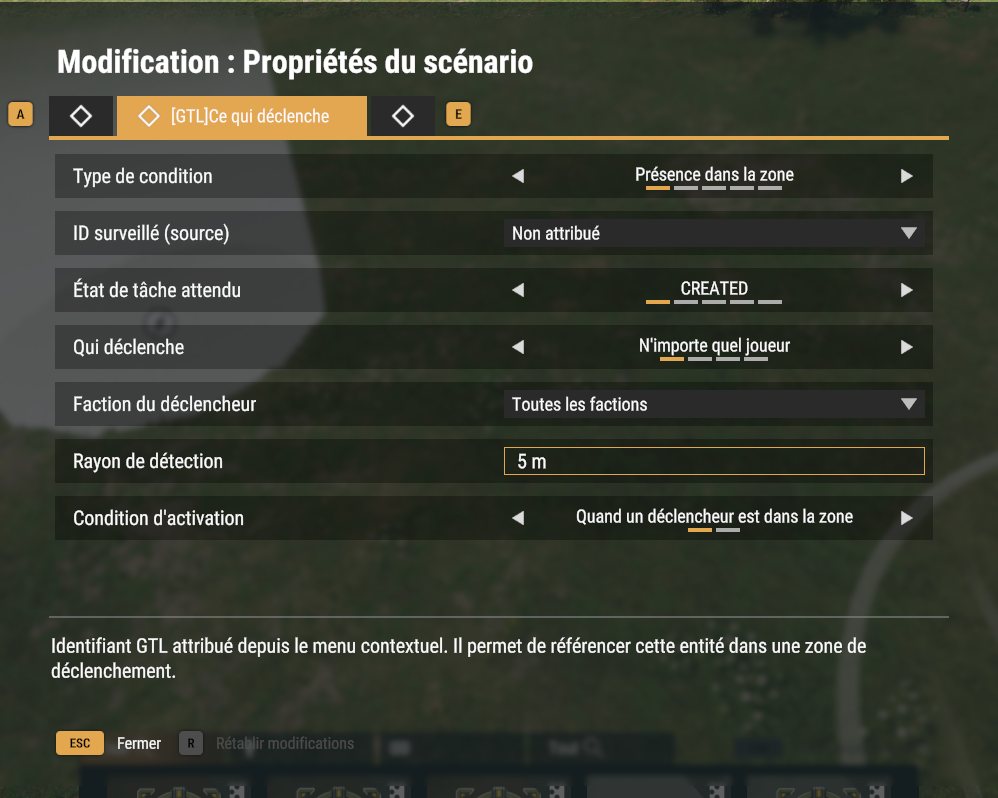
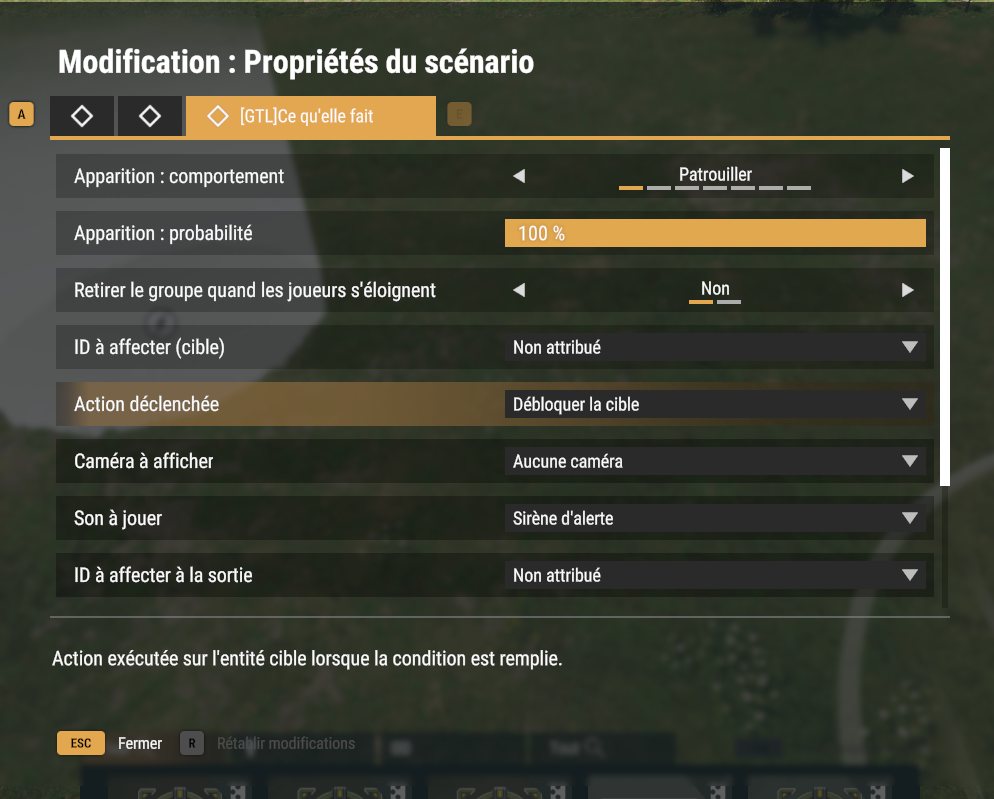
The condition can be a presence — a player, a faction, a specific entity, anyone — but also something that has nothing to do with location: an entity put out of action, a task reaching a given state, an interaction used by a player, or another zone firing. You set a radius from 1 to 500 m (in 1 m steps), a delay — immediate, countdown or hold —, whether the zone fires once or re-arms, and what happens when the condition drops.
A character only triggers the zone when standing inside the circle itself (within 30 cm): a 1 m zone in front of a door no longer fires when you walk past 2 or 3 m away. A vehicle, on the other hand, triggers as soon as any part of its body enters.
A preset menu at the top of the panel sets everything at once for common cases: a player walks in, a specific entity walks in, position held, zone cleared, on every pass, a player is spotted.
Spotted by AI. With the "Spotted by AI (in the zone)" condition — or the "A player is spotted" template —, the zone only counts what stands inside its circle and is seen right now by a living AI that treats it as an enemy, wherever that AI is (up to 300 m). Being only heard does not count, nor does a disguised player the AI takes for a friend. Who triggers, faction and delays apply as for presence: a 5 s "hold" thus requires being seen for 5 seconds in a row.
Example. A zone over the depot yard, template "A player is spotted", action "Fire the targeted module" on the alarm multi-action. Players can cross the yard at night, under cover; if they are seen, the siren goes off.
Example. A 60 m zone around the farm, condition "position held for 30 seconds", action "release the reinforcement group". Players have to hold on before the counter-attack sets off.
Holding and releasing AI
A group placed in Game Master immediately sets off to carry out its orders. The right-click "Entity held" freezes it: it stays in place, its orders on hold, until a zone releases it. You can thus prepare a whole mission in advance and let it unfold in order.
Holding also works on a waypoint: the group sets off normally, moves up to that point, and stops there. A zone releases it and it resumes its route — without its AI ever having been put to sleep, so it still reacts normally if someone shoots at it.
"Hold" is only offered where it makes sense: AI, groups and the game's waypoints. To hold back a GTL module, disable it instead ("Module enabled" box).
Setup: releasing a group as the players go by
- Place the group and its orders, then right-click it → [GTL] Assign a logic ID, and right-click → [GTL] Hold (send to sleep).
- Place a GTL Trigger zone on the players' path.
Basic settings tab:
Trigger template→ A player walks in. - What it does tab:
ID to affect (target)→ the group's ID,Triggered action→ Release the target.
Starting a convoy on a signal
A motorised patrol raises a specific problem: if you save the mission with the crew already on board, it will not get back into the vehicle on reload — the men come back on foot next to their truck. The workaround is to never put them on board while preparing, and to let the game get them in by itself.
Setup: a convoy that moves off on a trigger, and survives a reload
- Place the group about fifty metres from the vehicle, on foot. It must never be on board when you save.
- Give it its chain of waypoints: a move to the vehicle, then a Get In, then the rest of the route.
- On the waypoint just before the Get In, right-click → [GTL] Assign a logic ID, then right-click → [GTL] Hold (send to sleep). It really is the waypoint you hold, not the group: holding the group would put it to sleep on the spot from the start, whereas here it walks to the vehicle and stops there, ready to board.
- A zone targets that waypoint's ID with
Triggered action→ Release the target. When it fires, the men get in and the convoy drives off.
Why this setup survives a reload: the "held" state is a setting, not an action — which is why the save reads it back, just like "captive" or "door locked". On loading, the men are therefore waiting at their waypoint, exactly as you left them, and the game boards them when you release it.
Example. Three groups held on three axes. Three zones release them one after the other as the players advance: the assault comes in waves rather than all at once. The third is motorised: its truck only starts once the first two waves are engaged.
Your scenario on the map
On their map, the Game Master sees every module of the mod with its icon and title, AI groups in their faction colour, and a line from each trigger to what it watches and what it acts on. It is the quickest way to check that a mission is wired correctly.
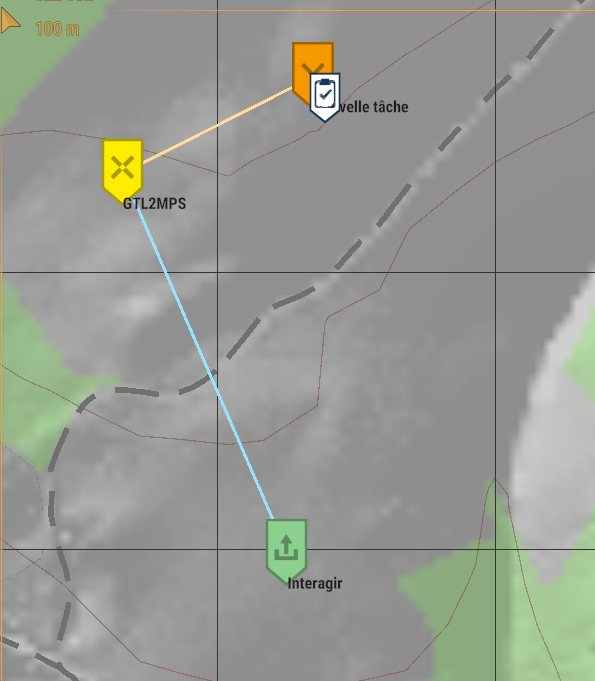
A Map tab in the scenario properties sets what is shown: every group, only those with an ID, or none, with one box per faction. An entity can also be hidden individually. Players see none of this.
The same tab has one box per family: zones, interactions, tasks, door locks, cameras, screens, multi-actions and cloning cards, plus one for tagged entities and one for waypoints. On a loaded mission, unticking everything except what you are wiring makes the map readable at once.
Example. Before starting the mission, a glance at the map is enough to spot a zone still pointing at a deleted group.
Creating a custom task
Place a Custom task module, right-click it, and write its title and text directly in game. The task joins the players' objective list, shows on their map and raises the game's usual notifications — it is a real task, not an imitation.
Its state (created, assigned, in progress, completed, failed, cancelled) and its visibility (nobody, the assignee, the group, the faction, everyone) are set by hand or by a zone. A task can therefore stay hidden until the players discover what triggers it.
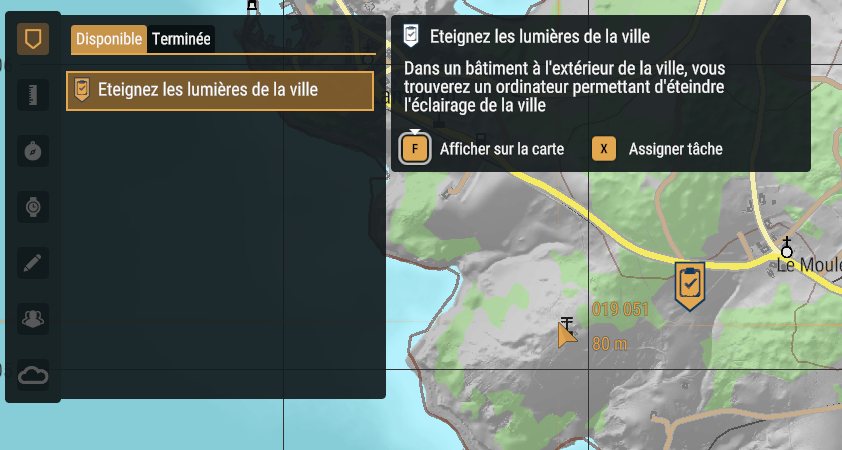
Three actions cover the common cases and are available everywhere — zone, interaction and multi-action module: "Task: completed", "Task: failed" and "Task: reveal it" (visible to everyone). They only need a target. For a rarer state or visibility, the zone keeps its two full actions, "change the state" and "change the visibility".
Example. "Find the convoy" stays hidden at first. When the players question the contact, the interaction itself reveals it. When they reach the wreck, a zone marks it completed.
Letting players pick their mission
The Task list module is a contract board. Attach up to ten tasks to it, then have an object's interaction point to it — a notice board, a radio, a briefing table. The player who uses it sees the list and picks one: it becomes visible to everyone, the others stay in the shadows, and the one just taken leaves the board.
Two ways to fill it, whichever you prefer: the module's ten slots, which set the display order, or the "Attach to a list" line in each task's tab, which puts it in the first free slot. Handy when you write the tasks as you go.
You have no labels to write: the menu shows the tasks' own titles. Rename a task, and the board follows.
Example. Three contracts posted at HQ: escort a convoy, sabotage a relay, find a missing person. The squad takes one, the other two vanish from the board — and the mission is not the same from one game to the next.
Writing a briefing
Place a GTL Briefing module — anywhere on the map, its position does not matter —, right-click it then "Write briefing": the same window as for tasks asks for a title and a text.
The text shows in the players' map journal, behind the "!" icon of the toolbar — the panel the game usually keeps for official scenarios. One module gives one entry: place several to separate situation, mission, execution and instructions. Everyone reads the same journal, whatever their side.
Titles and texts come back after a mission reload. A scenario that already brings its own journal keeps it: the mod never replaces an existing journal.
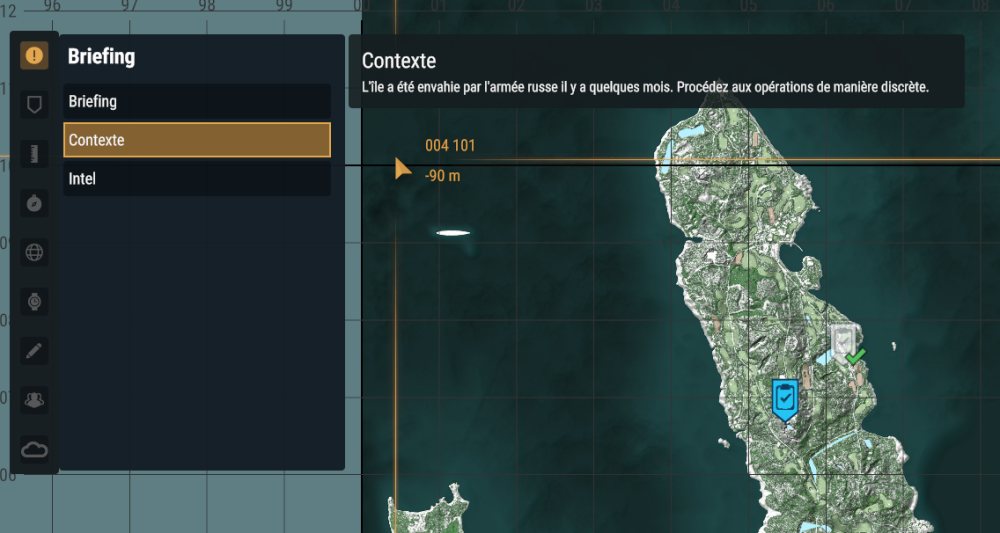
Example. Three modules: "Situation" describes the occupation of the village, "Mission" sets the objective, "Signals" gives the frequencies and the password. The players open their map at the start point and know what to do, without the Game Master having to repeat it.
Recording intel in the journal
A prompt lasts a few seconds and is easy to miss. Tick "Intel" on an interaction — in an entity's Interactions tab, or in the properties of a stand-alone interaction module —, and its text is written into the map journal ("!" icon) when a player uses it. It stays readable for every player, for the whole game, including those who join later.
That is what lets you build an investigation: players gather clues found at different times and places, and can read them again when they cross-check. Intel is information, not an objective: it no longer clutters the task list.
⚠ Intel already gathered does not come back after a save is reloaded: the interactions, however, stay marked as used. Only a player's action records intel — a zone firing it remotely does not.
Example. Three documents in three buildings. Each one gives part of the code; the players open their map to read them together before going to the safe.

Interactions, dialogues and evolving messages
Any entity can offer an action to the player who comes near it. This is set in its Interactions tab: you write the label and the text the player will read, and you choose whether the interaction works once or as often as wanted.
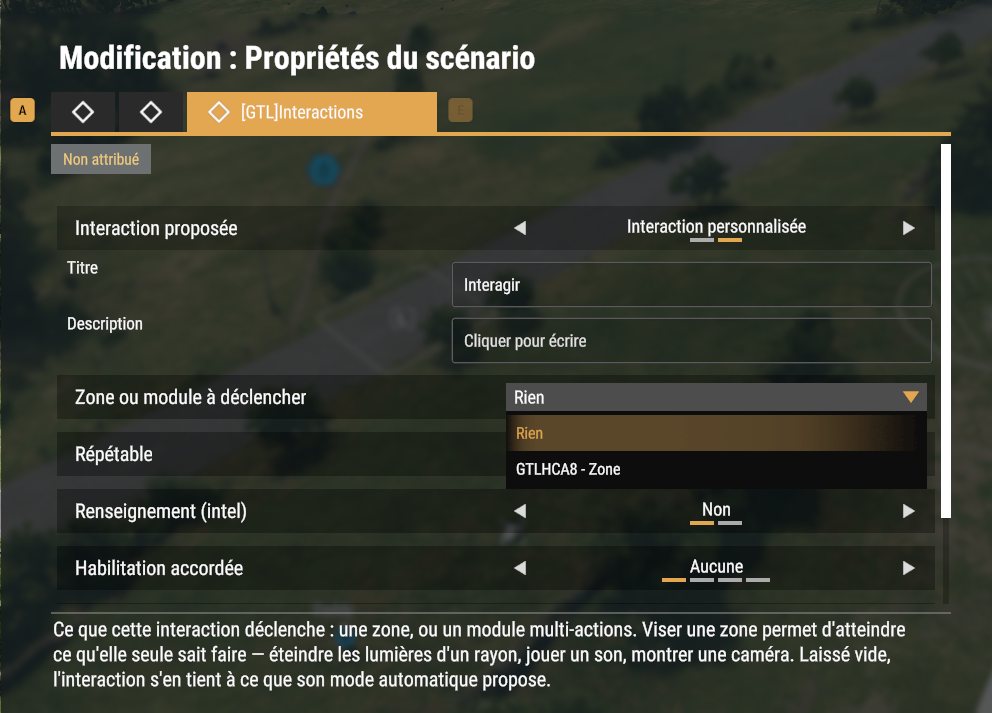
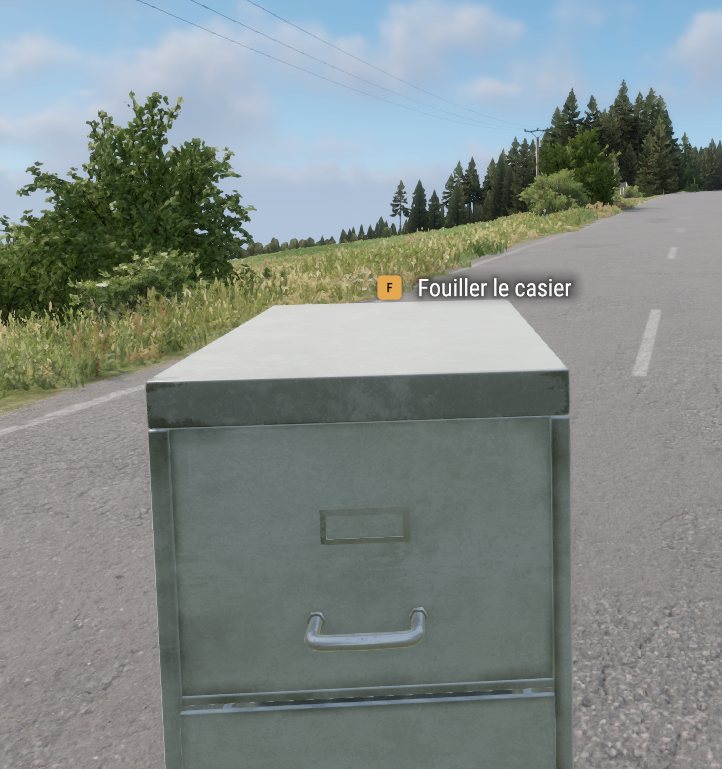
The interaction follows the entity: placed on a walking civilian, it stays available wherever they go. And its use can serve as a zone condition, which lets you chain events: the player talks to someone, and the mission moves on.
To go further, place an Interaction module. Its panel lets you pick the ID of the target entity, enable or disable it, and make it repeatable. The module moves onto its target and then follows it automatically. Left without a target, it stays where you placed it: handy for a button, a document or a precise spot. A single entity can carry several of these modules, each with its own text.
Several interactions can tell the steps of the same scene. A zone or a Multi-action module disables the line that has just been used and enables the next one: the same civilian then gives a different answer depending on what the players have achieved. On an object, the same mechanism replaces "Examine" with "Decipher", then with "Retrieve the code", without changing the object.
Who reads the message. This interaction setting chooses who its text is for:
- The player who acts (default): the text box at the top of the screen, for them only. Fired remotely by a zone, the interaction then shows nothing, as there is no player.
- All players: the text box for everyone, wherever they are — whether someone uses the interaction or a zone fires it. That is what lets a zone announce something: "objective reached, head back to base".
- Nearby players: a speech bubble above the speaking entity — an AI's head, the top of an object —, for every player within 50 m. It follows a walking AI, fades with distance, and a new line from the same entity replaces the previous one. A zone can thus make an AI speak to the players passing by.
A mission saved before this setting keeps its behaviour: the old ticked "Global message" box becomes "All players".
Countdown. The "Countdown (s)" setting makes the interaction wait: during the countdown, the player sees a text with the seconds ticking by ("Arming the charge… 12 s"), then the effect happens — the action, the text and the "used" flag that fires zones. The countdown text is written in the same window as the title; left empty, the mod shows "in progress…". A countdown that has started cannot be cancelled.
In a text, <br/> makes a line break.
Some interactions appear on their own, without you writing anything: a prisoner offers "Release", a wounded man "Wake up", a screen "Turn on".
Example. Before the truck is found, a witness answers "I didn't see anything". Searching the truck disables that answer and enables "Talk about the driver". After that exchange, a third interaction finally reveals where the convoy is and makes the next task visible.
Making someone captive or unconscious
Right-click a character: "Make captive" sits them down, puts their AI to sleep and turns them civilian — their former comrades will no longer shoot at them. "Knock out" lays them on the ground, and they stay there: the mod stops them from getting up on their own, which the game would otherwise do after a few seconds.
Both states can be reversed, by hand or by a zone, and the matching interaction — release, wake up — appears by itself for players. Both states survive a save, and a captive moved by the Game Master sits back down by themselves.
Example. Three hostages sitting in a cellar. The players free them one by one; a zone counts and triggers the extraction when the last one is on their feet.
Asking an AI to follow you
Tick "Follow me / Stay here" in a character's Interactions tab, and players can ask them to escort them, then to stay put. The escort gets in if you take a vehicle — but never behind the wheel, so you do not end up a passenger in your own car.
The prompt does not show while the character is tied up or unconscious: nobody follows someone sitting with their hands bound. It comes back by itself once they are freed or woken up.
Example. An engineer held in a hangar. You free him, ask him to follow, and drive him to the extraction point.
Stealing or copying an outfit
An interaction can give a character's outfit to whoever uses it, in two ways. Copy: the player gets a copy and the AI keeps its own — it is the coat rack, everyone helps themselves on the way. Take: the outfit changes hands, the AI is left in underwear, and the player's old clothes drop at their feet, ready to be picked up.
One box also takes the weapons and the rest of the equipment. Another limits the interaction to targets that are out of action, so nobody strips a sentry who is still standing.
Example. An enemy patrol taken out in a wood. The players take the uniforms from the bodies to walk into the base without being shot at.
Disguising as the enemy
Tick "Disguise fools the AI" in the GTL Rules tab of the scenario properties, and the outfit worn decides which faction the AI thinks it sees. In a Russian uniform, Russian soldiers let you through.

The spy icon. As long as you are disguised, this icon shows in the top right corner of the screen. If it disappears, you have been unmasked: the AI recognises you again.
⚠ Opening fire unmasks you. It is on by default ("Opening fire breaks the disguise"), and on purpose: without it, a disguise would be invincibility. It is not the shot that gives you away but the damage — firing in the air says nothing, hitting a comrade in uniform exposes you, grenades and vehicles included.
Getting your disguise back. An unmasked player gets their disguise — and their icon — back if no AI of the imitated faction, or an allied one, sees them during the "Delay before the disguise returns" (GTL Rules tab, 60 s by default, within 300 m; 0 = never, you then have to change outfit). Only being heard does not count, but a wound inflicted by an AI resets the delay: you do not build a new identity under fire.
You cannot disguise yourself under the enemy's eyes. Putting on the enemy outfit while an AI is watching fools no one: the disguise does not take, and a message tells you so. Change clothes under cover.
Example. Infiltration in enemy uniform up to the command post. The players have to choose: plant the charge without firing, or open fire and run.
Saving outfits and handing them out
Dress a mannequin however you like — loadout editor, arsenal, by hand —, then right-click "Create a new outfit": a window asks for a name, and the whole kit is saved: clothes, weapon, accessories and magazines.
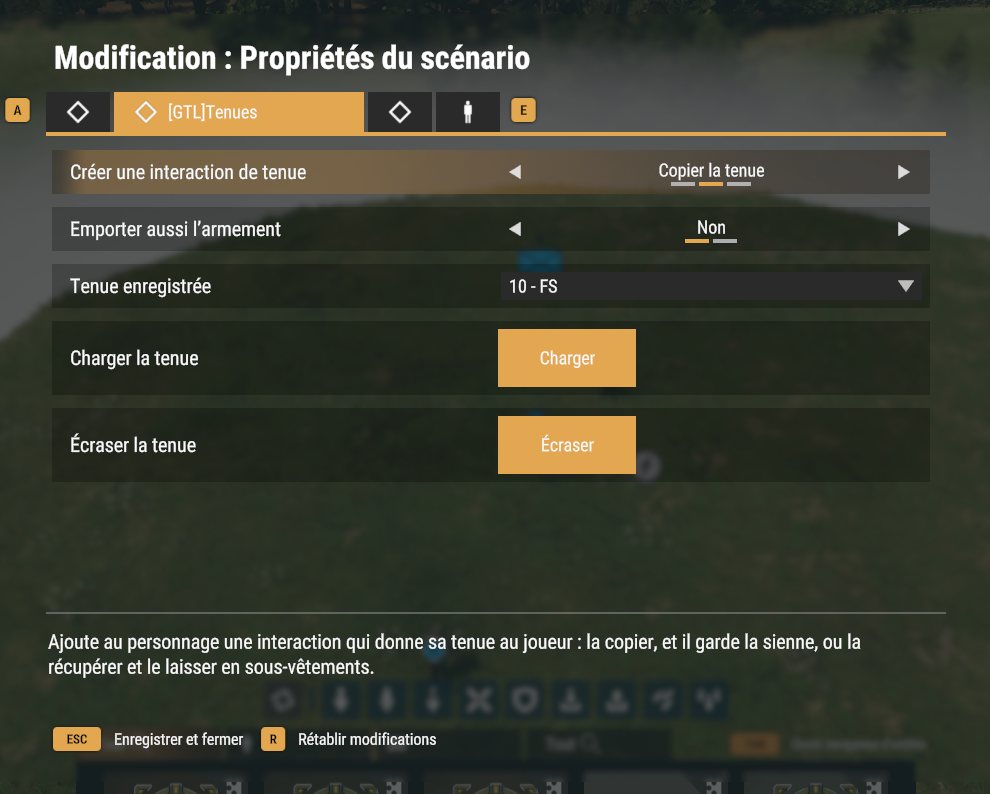
Then assign this outfit to any object — a wardrobe, a crate, a table — and players find a "Gear up" prompt there, usable by the whole squad. A player who is already dressed is really re-dressed, not weighed down: whatever does not match is removed and replaced.
The outfit lives in a file, not in an entity: the mannequin can be deleted, and the outfit survives a reload — which the gear worn by an AI does not.
Example. A "night scout" outfit saved once, handed out by three wardrobes in three different bases.
Copying a template group
Prepare one group carefully — outfit, weapons, AI settings — and spawn as many copies of it as you want, wherever you want, whenever you want. The original group becomes a template: frozen, invisible to players, it is only there to be copied. Copies take everything from the template, including settings added by other mods, and the outfit of each of its soldiers — when they spawn and every time the dynamic spawn brings them back.
The simplest setup: a patrol that appears when a player comes near
- Place the group out of the way, equip it as you like, then right-click it → [GTL] Assign a logic ID. Note the ID shown.
- Place a GTL Trigger zone where the players will pass.
Basic settings tab:
Trigger template→ A player walks in, then set theDetection radius. - What it does tab:
ID to affect (target)→ the template group's ID,Triggered action→ Spawn a copy of the group. - Choose the
Copied group behaviour— for example Patrol or Move to the trigger source. The original group then freezes by itself: the "Spawn zone template" box ticks itself as soon as a zone targets it.
The zone's radius is also the group's working area. A patrol loops within that radius, sentries spread out inside it. A ten-metre zone therefore gives a patrol marking time: widen it to the size of the sector the group has to hold.
Detect far away, spawn under cover
Spawning a group right under the players' noses shows. The two-zone setup separates the place where you spot from the place where reinforcements spawn: detection at the village entrance, reinforcements coming out of a wood four hundred metres away — and they head for the player who triggered it, even if they are far from their spawn point.
Two-zone setup: zone B spawns, zone A triggers
- Zone B — the one that spawns. Place it where the reinforcements should appear, and give it an ID (right-click → [GTL] Assign a logic ID).
- On zone B, What fires it tab:
Condition type→ Fired by another zone. This zone then never fires on its own: it waits to be called. Its radius no longer detects anything, it only serves as the group's working area. - On zone B, What it does tab:
ID to affect (target)→ the template group,Triggered action→ Spawn a copy of the group,Copied group behaviour→ Move to the trigger source. - Zone A — the one that detects. Place it on the players' path.
Basic settings tab:
Trigger template→ A player walks in, and aDetection radiusmatching the passage to watch. - On zone A, What it does tab:
ID to affect (target)→ zone B's ID,Triggered action→ Fire the targeted module.
What makes this setup interesting: zone A does not just wake up zone B, it passes on the player who has just walked in. That is why "Move to the trigger source" sends the group towards that particular player, and not to the centre of zone B.
"Move to" and "Hunt" take a snapshot of a position, they do not chase. The group heads for where the trigger source was at spawn time: if the player has moved in the meantime, the reinforcements arrive where they used to be. This is intended — a constant chase would make the AI all-knowing.
These two behaviours have no effect if nothing triggered the zone: a purely logical condition (a task completed, an entity destroyed) designates nobody, and the group stays put. Prefer "Patrol" or "Search and destroy" in that case.
The seven behaviours, and when to pick them
- Patrol — loops within the zone radius. The feel of a held sector.
- Search and destroy — sweeps the radius looking for the enemy. Use it with a large radius, or the group marks time.
- Defend the position — spreads out as sentries around the arrival point.
- Hold the position (in combat) — the same, but the group takes cover right away. For reinforcements who know they are arriving under fire.
- Wait in place — does not move. Useful when another zone will give them their orders later.
- Move to the trigger source — walks to the recorded position. Converging reinforcements.
- Hunt the trigger source — same destination, but looking for contact on the way.
A reusable zone sends a new wave as soon as the previous one is wiped
out, with no need to leave the zone and come back. Untick "Single use" and use the
Cooldown between cycles as a breather between two waves.
The Copied group spawn chance makes an ambush uncertain. Beware: the
roll happens when the zone fires, so a single-use zone is used up even if the roll
fails.
Finally, the Dynamic spawn lets you populate a large map without
overloading the server: choose the distance at which the copied group takes shape (500 to
2500 m). Beyond it, the group withdraws and costs nothing; it comes back as soon as a player
approaches. You can thus prepare dozens of spawn zones all over the map: only those near players
carry live AI. Leave it on Disabled for an ambush meant for a precise spot, which has to
be waiting for you.
Note that this setting does not affect the zone's Detection radius,
which only says where the group works once spawned. The withdrawal distance is automatically
larger than the spawn distance: a player walking along the edge does not make the group
flicker.
Full example. A four-man template in a corner of the map, never seen by anyone. Three "spawn" zones placed in three copses around the village, each set to Fired by another zone, with a 60 % chance and "Move to the trigger source". A single detection zone at the village entrance fires all three. Result: between zero and three patrols converge on the player, from different directions, and never the same way twice.
Vehicle service points
The game offers a "heavy" vehicle service point. The mod adds two specialised ones, found by
typing GTL in the entity browser:
- GTL Vehicle service - light vehicles: jeeps and vans.
- GTL Vehicle service - helicopters: to be placed on flat, open ground.
Vehicles appear around the module, with no slot to place next to it. As with the game's service point, they use the supplies available nearby (about 185 m), and a point only serves players of its own faction.
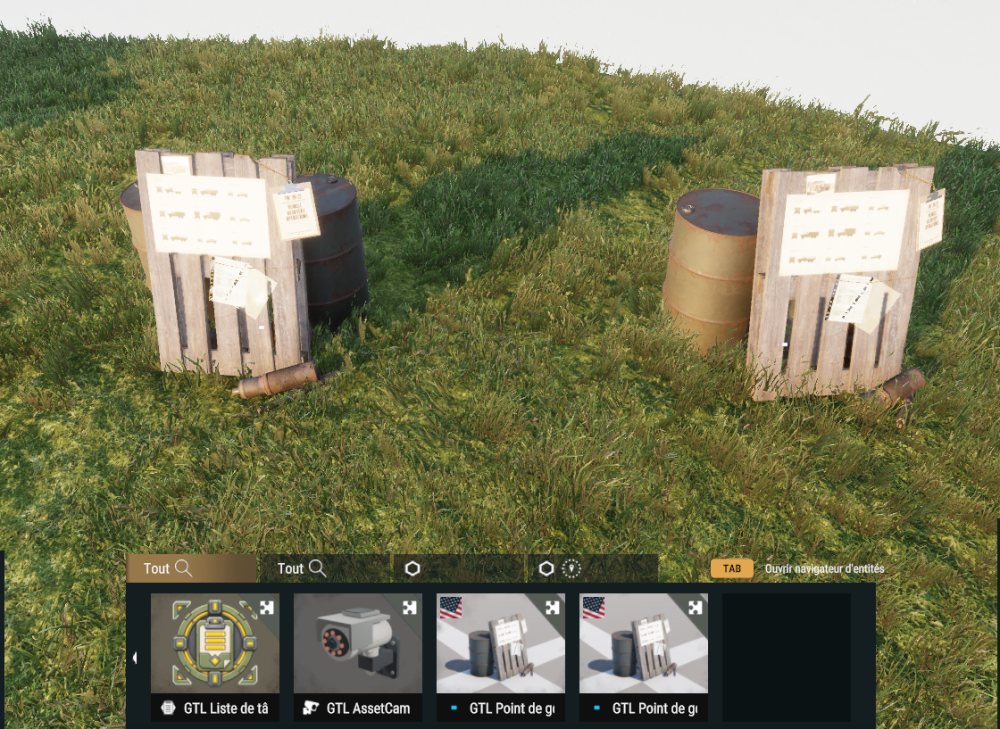
⚠ These two points are restricted to the US faction for now.
Example. A forward base with a supply depot, a "light vehicles" point at the entrance and a "helicopters" point on the drop zone: the squad chooses for itself how to reach the objective.
Drawing a route
The game's waypoints can only be placed with a group selected, and they belong to it: you cannot prepare a path in advance, nor have several groups follow it. The GTL Waypoint module is placed on its own and names the next one by its ID: you draw the network once, and any group can be sent along it.
Each module carries:
- A movement type: move here, walk here, hold position, wait here, get in, get out.
- The next waypoint, picked from the list of IDs.
- A vehicle, for "get in" only.
- An arrival radius: game default, or 1 to 20 m. The game stops a group as soon as it is within 5 m of a "move" point; a small radius makes it stop much closer to the centre — in front of a door, at the foot of a staircase.
Two ways to send a group along it:
- Right away: the "Route to follow" field in the AI's or group's basic settings. Pick the first point, and the route is assigned.
- On a condition: the zone action "Send along a route", where the target is the group and the parameter is the route.
A waypoint can be disabled, from its settings or with a right click. A group sent along a route whose first point is disabled waits instead of skipping it: enable that point again, and it sets off. That is how you start a convoy on a signal, without holding the AI.
A last module pointing back to the first makes a loop: the group goes round forever. It is more flexible than the game's cycle, where changing one link means redoing the whole chain.
⚠ Do not come back to a point in the middle (A → B → C → B): the chain is malformed, the route stops and the log says so.
Example. You draw a five-point loop around a depot. The morning patrol follows it; so does the night patrol, without you having to redraw anything. A sixth "get in" point sends the relief by truck to the neighbouring post.
Spawning an entity, even from another mod
A zone can spawn any entity you have stored first: a game support module (smoke, flare), an object, or a module from another mod.
- Place the entity once and set it up.
- Right-click it → Add to spawnable entities, then give it a name ("Green smoke"). Its settings are stored with it.
- On a zone, choose the action "Spawn a stored entity" and, in "Entity to spawn", the one you have just named.
The entity appears at the centre of the zone, on the ground, as if you had placed it yourself: it is therefore saved with the mission and cleared when another one is loaded.
The "Stack spawns" box decides what happens when the zone fires again: unticked, a new entity only appears if the previous one is gone (smoke burnt out, object destroyed); ticked, every firing adds one.
⚠ A smoke grenade deletes itself when its smoke burns out. Store it while it is still smoking. The list keeps 32 entries, shared by every mission on the server.
Example. A repeatable zone in front of the enemy camp: every time a player comes near, a smoke screen appears to cover the defenders' sortie.
Locking a door
Right-click any door in the world — buildings included — then "Lock the door". It now requires a clearance: Sentinel, Nomad or Vanguard.
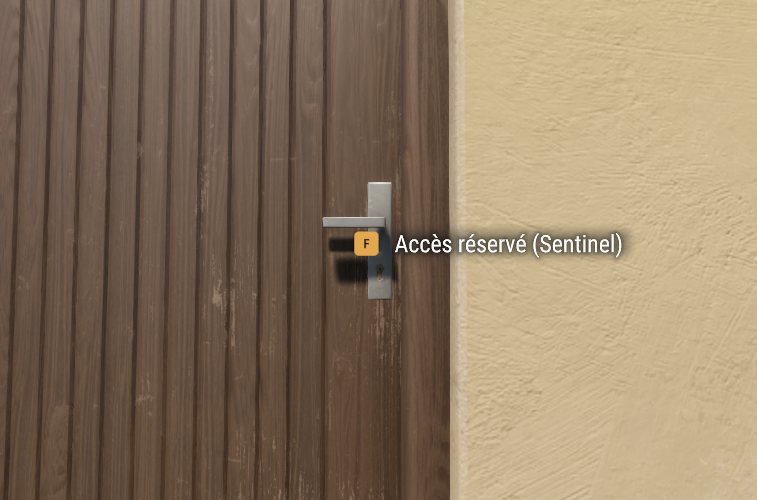
⚠ None of them includes the others. A door requires exactly one, a card can hold several. That is what makes scenarios possible: with ranked levels, a higher-rank card would open everything.
The door answers instead of staying silent: "Access restricted to Nomad", "Door unlocked". A refusal thus becomes an event the scenario can hear, and opening the door can fire a zone.
Watching a door without locking it
Right-click the door → [GTL] Watch this door. The door stays free and opens normally, but it gets an ID and its opening is recorded: a zone with the condition "After an interaction" targeting it fires as soon as someone opens it. That is the right way to trigger an alarm or an ambush when an ordinary door is opened.
⚠ Lock both leaves of a double door, or neither. A single locked leaf does not stop the players, but an AI stays stuck in front of the entrance trying to open it.
Example. The weapons depot requires Vanguard. The only Vanguard card in the mission is on an officer patrolling outside.
Cloning a clearance with a card
The RFID cloning card is placed in Game Master and picked up like any object. It needs to be neither in hand nor in a specific slot: it answers from the pocket, and several cards add up.
An interaction can grant a clearance to whoever uses it — provided they carry a card. The mod never creates one: finding a card is one step, getting it cleared is another. Without a card, the player gets a message telling them so.
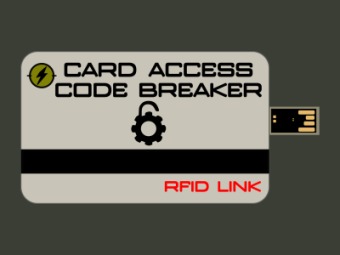
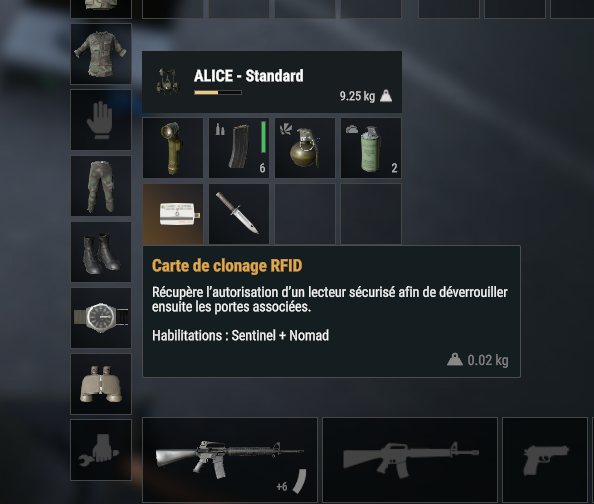
Example. A technician in the workshop, interaction "Get clearance", Nomad level. The players first have to search the offices to find a blank card.
Putting an item in an inventory
Place the item wherever you like — an access card, a document, a weapon —, open its properties and choose, in the "Inventory placement" field, the entity that should hold it. When you close the properties, the item is stored there: a crate, a vehicle, a body, a living AI.
The field only lists tagged entities that have an inventory, and it only shows on items that can be picked up: on a rock or a building, it has no reason to exist.
The storage is part of the mission. That is the whole point of the setting: an item simply dragged into a chest comes back lying on the ground after a reload, whereas an item placed through this field finds its chest again — even if the chest is recreated after it.
Example. The bunker access card sits in an office drawer, on the other side of the map. The players have to search to find it; and if the game resumes three days later, it is still in the drawer.
Opening and unlocking doors remotely
Four actions, available from a zone, an interaction or a module: unlock, lock again, open, close.
Unlocking suspends the clearance requirement without erasing it: locking again restores the original one. Opening makes the door move by itself, without anyone touching it — and works on any door, with or without a lock.
Example. A button in the guard post opens the depot gate remotely. Or: when the "cut the power" task is completed, every door in the building unlocks.
Surveillance cameras and screens
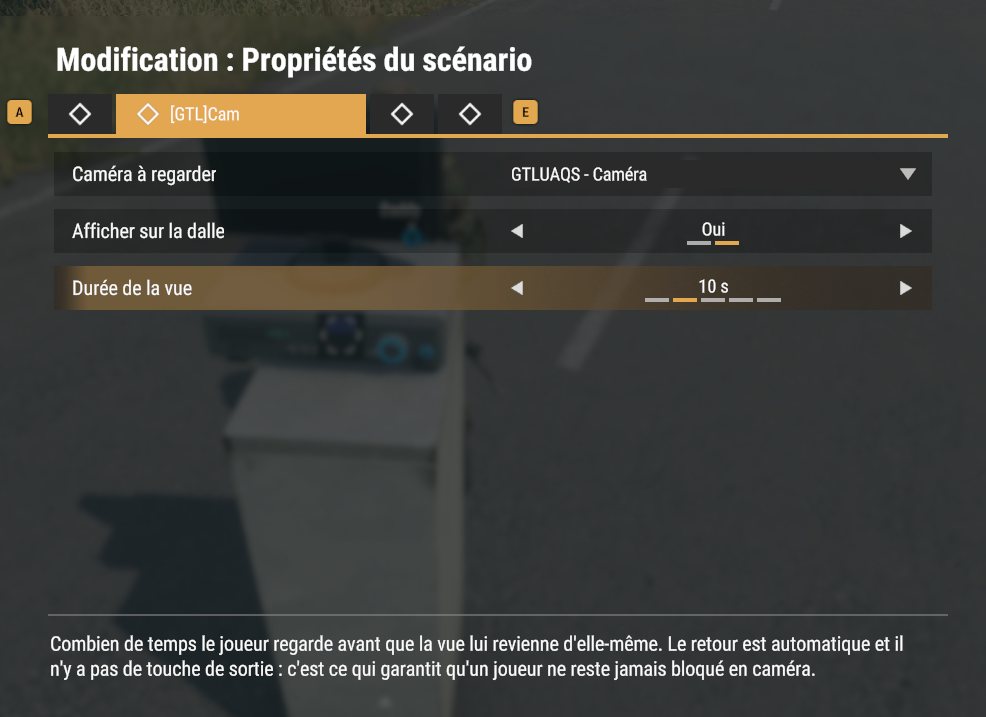
Place a GTL VueCam, aim it using the binoculars that represent it, and give it an ID: it is the viewpoint, invisible in game. Place a screen, and in its Cam tab choose the camera, the view duration, and whether the picture shows on the screen panel or full screen. That is enough: the screen offers a "Turn on" prompt by itself.
Two screens are available: the security monitor standing on its recorder, and the 44-inch wall screen to hang on a wall. They are set up exactly the same way.
On the panel, the player stays where they are, out in the open while watching — far more tense than full screen. The picture is shared with every player within 10 metres: two teammates in front of the same monitor see the same thing. The full screen view stays private. In every case the view comes back by itself after the set delay: nobody can get stuck, even if they forget the exit key.
Up to four screens can be on at the same time, and one screen can offer several cameras for the player to choose from. Place a GTL AssetCam at the same spot as the VueCam if you want players to see a camera box on the wall: it is purely decorative and films nothing.
One screen, several cameras to choose from
- Place a GTL Multi-action and tick "Offer a menu to the player". For each entry: the target is a camera, the action "Show the targeted camera". Right-click → [GTL] Write the menu entries to name the choices.
- On the screen, Cam tab: "Camera or menu to show" = that multi-action.
The player turns the screen on, picks "Parking", and the view appears on that monitor. With "Play one random action" ticked instead of the menu, the screen shows a camera drawn at random.
Turning on a wall of screens at once
Set each screen's camera (Cam tab) and "Show on the panel", then target the screens from a zone or a multi-action with the "Turn on the targeted screen" action: each one behaves as if its "Turn on" had been pressed. A player must be behind the firing, and within 10 m of the screens.
Letting the player aim the camera
Tick "Player can move view" in the screen's Cam tab: turning the screen on then hands over control of the camera, with no second interaction to learn. A key reminder shows when the screen comes on.
- 8, 2, 4 and 6 on the numeric keypad aim the view.
- + and − set the zoom.
- * restores the view set by the Game Master.
- Delete leaves the view.
These keys can be rebound in Options → Controls, category GMTasks and TriggerLinks. They work both on the panel and in full screen.
In full screen, a monitor frame reminds you that you are looking through a camera; its icon tells whether the view can be aimed (arrows) or is fixed (crossed circle).
Caution. When a zone shows a camera, its target is the screen, never the camera — the camera is chosen separately, in the zone's "Camera to show" setting. Targeting the camera is the natural reflex; the zone then refuses to act and tells the player so.
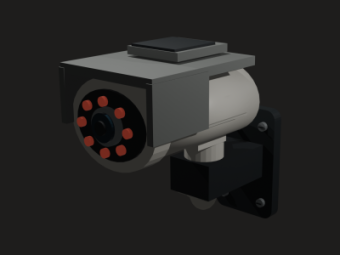
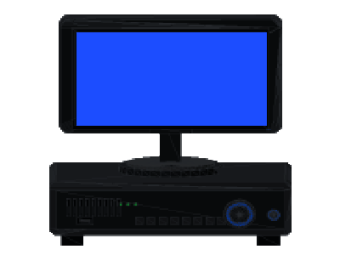

Example. A security post with four monitors, one per entrance of the compound. Or: a single screen, a menu, and the player chooses which camera to check — at the risk of watching the wrong one.

Shooting a cinematic
The GTL Cinematic module plays a camera fly-through for players: a mission intro, a convoy arriving, an objective being revealed. It reuses the GTL VueCam modules of the surveillance screens: place one per viewpoint, aim them, give them an ID.
In the module's [GTL]Cam tab, pick up to six VueCams, in the order of the move. The view takes each one's position and looks in its direction. An empty slot is skipped: two VueCams give a simple start → end move, a single one gives a fixed shot. The other settings:
- Duration of each move: how long the camera takes to go from one VueCam to the next, with eased start and end. With a single VueCam, it is the duration of the shot.
- Music: optional, played during the sequence, then faded out.
- Who sees it: all players, the players inside the zone that starts it — even through a multi-action —, the triggering player, or one faction.
The title and subtitle shown during the sequence are written with a right-click on the module: "Write the cinematic title".
The sequence is started by the "Play the cinematic" action, from a trigger, an interaction or a multi-action — or by "Fire the targeted module". It opens and closes on a fade to black. While it lasts, the players concerned are immobilised and protected from damage; movement already in progress is stopped. Their view and controls return at the end.
Example. A zone around the spawn point, on a presence condition, with a five-second countdown: it plays a cinematic set to "Players in the zone". The camera leaves the harbour, follows the coast and stops on the village to search, while the mission title appears.
Switching off a district's lights
A zone can switch off — or back on — every light within its radius. Street lamps, indoor lighting: the zone's radius marks out what goes dark, and the action has no target.
Like every action, it can be fired from a zone, an interaction or a module — so at a set time just as well as when a player presses a button. Here is the button setup:
The ZONE, placed over the district to black out
  What fires it
     Condition type      = Fired by another zone
     Detection radius    = 150 m
  What it does
     Triggered action    = Switch off the lights in the zone

The OBJECT (a switch, a box)
  Interactions
     Title                 = "Cut the power"
     Zone or module to fire = the ID of the zone above
⚠ The zone detects and switches off within the same radius. To spot players at the village entrance but black out the whole village, you need two zones: a small one that detects and fires, a large one that carries the blackout.
Example. A switch in the utility room blacks out the whole district. The assault happens in the dark, with night vision goggles.
Playing a sound
A zone can play a sound from its catalogue where it stands — sirens, radios. Since the game's sirens are loops, a stop delay is provided: they will not wail until the end of the game.
Example. The base siren goes off when the players cross the perimeter, and stops after twenty seconds.
Changing the time of day during the game
The zone action "Change the time of day" sets the time to the value of the "Time of day to set" setting, from 00:00 to 23:45 in quarter-hour steps, for every player at once. It has no target.
Like any zone action, it can wait for a condition — a task completed, a place reached — or be fired from a button, through a zone set to "Fired by another zone". Time then keeps flowing normally.
Example. The mission starts at 16:00 for the recon. When the "spot the camp" task is completed, a zone sets the time to 23:00: the assault is played at night, without waiting seven hours.

Combine, let the player choose, or draw at random
A zone plays only one action. The Multi-action module carries four: four targets and four actions, which can themselves fire zones or other modules. It works in three modes:
Run everything. The normal mode: a zone, an interaction or another module fires it, and every configured entry goes off together.
Offer a menu. Give each entry a label and the player chooses which one to run. Ideal for a console, a dialogue with several answers or several cameras on the same screen. If no player is behind the firing, nobody can choose in their place and the module plays its entries normally.
Play one random action. Each time it fires, the server draws a single entry among those not set to "None", with the same chance for each, then plays only that one. Menu and random modes exclude each other automatically.

The "Fire the targeted module" action targets a zone, a module or an entity's interaction alike — it is played as if a player had used it: a desk opens four doors, a console hands out four outfits. Its neighbours "Enable" and "Disable the targeted module" do not fire it: they make it able to fire, or stop it from doing so.
The three task actions — completed, failed, reveal it — are available here: validating one objective and revealing the next fits in a single module.
Caution. "Change the state" and "change the visibility" of a task remain zone-only: the value to apply would have been shared by all four entries, and an oversight would have hidden a task silently. For these rare cases, target a zone carrying the action.
Example. The alarm: siren, "stay unseen" task failed, two groups woken up, doors locked — all in a single module, fired by the zone that detects the intrusion.
Placing an entity at random
The zone action "Move the target here" carries an existing entity to the centre of the zone. It neither deletes it nor makes a copy: its ID, state and links stay the same. An interaction thus keeps following its character, and a task marker moves along with it.
To pick a random position at the start of a mission, prepare this setup:
1. Give an ID to the entity to move.
2. Place a zone on each possible destination.
   Condition = Fired by another zone
   Action    = Move the target here
   Target    = the same ID in every zone
3. In a Multi-action module, create one entry per destination.
   Action    = Fire the targeted module
   Target    = the ID of one of the destination zones
4. Tick "Play one random action".
5. Have this module fired by a zone near the start.
The same principle is not just for characters: you can move a task's location, the specific enemy to take out, an ally to rescue, a vehicle or an important object. Each run of the mission keeps the same logic, but reshuffles the places.
⚠ Move the entity that actually carries the scenario. For a squad, target the group so its members follow. For an isolated captive, target the character directly.
Example. A captive pilot can be in one of four buildings. The players always get the same task and always talk to the same character, but have to look for him in a different place every game.
Moving the player
The "Move the player here" action carries the player who fired it to the centre of the zone — the one who walked into a zone, used an interaction, or started a chain of zones. No need to give them an ID: the firing itself designates them. A player in a vehicle is moved with their vehicle.
Zone A (where the player passes)
   Condition = A player walks in
   Action    = Fire the targeted module
   Target    = the ID of zone B

Zone B (the destination)
   Condition = Fired by another zone
   Action    = Move the player here
It only exists on entry: when a zone empties, there is no player left to designate.
Example. A well ladder that leads nowhere: a "Climb down" interaction on the well fires the zone placed in the tunnel, and the player ends up there.
Saving and loading a mission
The mod saves your missions by itself, through the GTL Missions tab of the scenario properties. There is nothing else to install, and it works in a local game as on a dedicated server: locally the file goes into your profile, on a server it stays on the server and becomes visible to every Game Master.
- Save as opens a window where you name the mission. The same action is offered by a right click in empty space → [GTL] Save mission as…, which opens straight away.
- Save updates the mission loaded or saved last, without asking anything: right click in empty space → [GTL] Save.
- Load takes a mission from the list and puts it back in place.
What is saved: the placed entities and how they nest, all their editor settings — hence every setting of the mod —, the texts written in game and the characters' outfits. Compositions (arsenal, camp…) come back whole, with the pieces you had removed still missing.
A mission is self-contained. Its file carries its texts — tasks, briefings, interactions, menus — and the list of mods it uses. Copied to another server, it comes back complete; if a mod is missing, the server log names it on loading, instead of letting entities vanish without explanation. It also carries the outfits of the wardrobes and AI that use them: another machine no longer finds an empty slot or a different outfit. Save your older missions again once to include them.
Factions are saved by name, no longer just by their rank in the list: a French (AMF) spawn point no longer comes back American on loading. Here again, save the affected missions again.
Publishing a ready-to-play mission
A GTL mission can be delivered as a separate scenario mod: players download it, start the scenario, and the mission rebuilds itself on startup — with no Game Master needed to load it.
- Put the mission file inside the mod, and give its path in the new
m_sGTLMissionFilefield of the scenario header. - A server administrator can do the same through
missionHeaderin the server configuration. - The launch parameter
-gtlMission <path>does the same without a scenario header — handy for testing from the Workbench World Editor.
Missions live in the profile, under
GMTasksAndTriggerLinks/missions/<world>/: one file per mission, which can be
copied from one machine to another.
Cleaning up the scenario. Right click in empty space → [GTL] Clean up the scenario deletes everything that belongs to a mission and leaves only the persistent scene. No mission is "current" any more: the loaded mission stays untouched on disk, and you have to go through "Save as" to overwrite it.
⚠ Loading replaces everything placed in Game Master. The world's scenery and the entities of ambience mods are not touched.
⚠ The contents of chests and vehicles are not saved, nor is damage. For an item to be in a chest on loading, use the item's "Inventory placement" setting.
Example. You prepare your mission on Sunday afternoon and save it as "Depot raid". Come the evening, any Game Master reloads it in two clicks and the game begins.
Autosaving the game in progress
A loaded mission starts again from the state in which you saved it. On a server running for days, everything players have done since would be lost at the first restart. The "Autosave" setting of the GTL Rotation tab fixes that:
- Off.
- With the vanilla save: on every game save (automatic, manual or at server shutdown). Pick it on a server that uses the game's persistence, so that the players' gear and the mission stay at the same point in time. If the server in fact never saves the game — persistence disabled by the scenario (Worthy Islands GM, for example) or an interval set to 0 —, GTL switches by itself to a save every 15 minutes and warns the Game Master.
- Every 5, 10, 15, 30 or 60 minutes, on a server without game persistence.
The game is written to a separate slot, "Autosave": the mission you prepared is never overwritten and can always be replayed from the start. When the server restarts, the most recent autosave is reloaded, and the rotation still knows which mission it comes from.
GTL keeps a history (_Autosave, _Autosave_2,
_Autosave_3…): the "Autosaves kept" setting of the GTL Rotation tab,
1, 3, 5 or 10 (3 by default). Loading another mission, ending the mission or cleaning up the
scenario no longer throws the current autosave away: it moves down the history, from which a game
reloaded by mistake can be recovered in one click, from the GTL Missions tab.
The "Save systems" button of the GTL Missions tab tells you what really saves on this server: game persistence, mode and time of the last GTL autosave, current and startup mission, rotation, persistent scene and loaded save-related mods.
⚠ Saving is instant but not free: on a very large mission, the server may pause briefly at each save. Prefer a long interval.
Example. An RP server open all week, with game persistence for the players' gear. Setting "With the vanilla save": after the nightly restart, opened crates, forced doors and freed prisoners are still in the state the players left them.
The persistent scene (permanent scenery)
The scenery — a base, a camp, barricades — that must stay in place whatever mission is loaded, including when the server restarts. It is saved in no mission: it is therefore never duplicated, and loading a mission does not erase it.
- Right click in empty space → [GTL] Clean up the scenario: only the current scenery is left.
- Unlock it ([GTL] Unlock the persistent scene), then place, move or delete whatever you want.
- Right click in empty space → [GTL] Save the persistent scene. A window shows what is about to change: elements already saved, elements about to join, elements that would be lost. Nothing is written until you confirm.
- Lock it again: the scenery can then no longer be selected, moved or deleted by mistake while you build a mission.
While the scene is locked, the save option is hidden: unlocked = scenery mode, locked = mission mode. The scenery is visible to players anywhere on the map, even far from its point of origin.
⚠ Everything placed at the time of saving joins the scenery. Hence the clean-up first: without it, the current mission would join it too. The zones and chests of La nouvelle ère Loot Config never join it.
Example. Your community's main base, with its arsenal, vehicles and helipad, placed once and for all. Every evening, a different mission loads around it.
Removing duplicates
Copies can pile up at the same spot: a mission saved into the scenery by mistake, or a game save made with an older version of the mod. The GTL Missions tab has a "Find duplicates" button.
- Only identical entities are affected: same object, same place, under the same parent.
- A window reports what was found; nothing is deleted until you confirm.
- The copy kept is the best one: the one carrying an ID or an author. A configured module is never deleted in favour of a blank copy.
⚠ Unlock the persistent scene first: the copies it contains are protected while it is locked, and the window tells you so. After the clean-up, save it again.
AI that have moved since are no longer "at the same spot": the tool targets objects and modules that do not move.
Ending the mission
In Game Master mode, a game never ends by itself. Place a GTL Mission end module and have it fired: players see the end screen, then the server reloads the scenario.
The module carries everything there is to say at that moment:
- The screen title: Mission over, Mission accomplished or Mission failed.
- The debriefing text, written with a right click on the module.
- The next mission, when rotation is on — see the next section.
It is fired like any module: a zone, an interaction or a multi-action targeting it with the "Fire the targeted module" action. A single mission can therefore have several endings — a victory, a failure — each with its own module, title and text.
The delay before reloading is the server's: 30 seconds by default in Game Master, adjustable through the automatic reload option (up to 600 s).
⚠ Without rotation, the world comes back empty. The reload starts again from the base scenario: to get a prepared mission back, turn on the rotation described below.
Example. A zone watches the "extract the pilot" task. As soon as it is completed, it fires the "Mission accomplished" module, which shows its debriefing and moves on to the next mission — without anyone having to step in.
Chaining missions
Rotation turns a server into a campaign: at the end of a mission, the server reloads the scenario then puts the next mission in place, on its own. It relies on the missions saved through the GTL Missions tab — no other mod is needed.
Everything is set in the GTL Mission rotation tab of the scenario properties: the "Enable rotation" box, then ten slots, Mission 1 to Mission 10, where you pick among the missions saved for this world. A slot left on "None" is simply skipped.
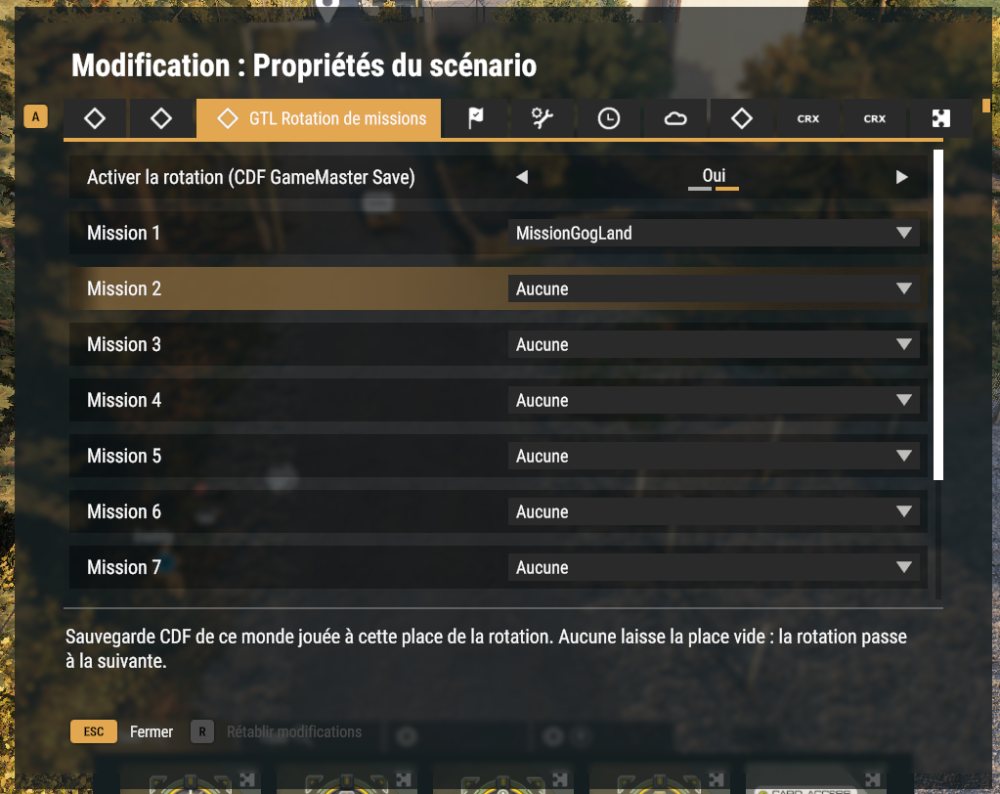
The GTL Mission end module decides what comes next, through its "Next mission" setting:
- Next in rotation: the campaign moves one step forward.
- Reload the current mission: the same one is replayed, after a failure for example.
- Mission 1 to 10: a direct jump, for an alternative ending.
Saved missions: Infiltration, Convoy, Assault

Scenario properties > GTL Mission rotation
   Enable rotation = yes
   Mission 1 = Infiltration
   Mission 2 = Convoy
   Mission 3 = Assault

In each mission:
   "Mission accomplished" module -> Next mission = Next in rotation
   "Mission failed" module       -> Next mission = Reload
Without rotation, the "Startup mission" setting of the same tab says which mission to load when the server starts. With rotation on, the first mission in the list starts, and that setting is greyed out. The tab also shows the current mission at the top.
These settings belong to the server, not to the missions: they apply to every mission of this world, and the list offered updates itself when you save new ones.
⚠ Save each mission ready to play. It restarts exactly from the state in which you saved it: a mission saved at the end of a game would replay the ending.
⚠ Prefer a named slot to "Next" if you sometimes load a mission by hand: a load made from the tab does not tell the rotation where it stands.
Example. An evening in three acts. The players succeed at the infiltration, the server moves on to the convoy; they fail the convoy, it reloads it; the third act only opens once the convoy has succeeded.
What survives a reload
A reloaded mission comes back as you left it. Beyond the entities and their position, the mod carries through the save everything that makes up the logic of your scenario:
- IDs, settings and states — captive, unconscious, held, locked, interaction used, waypoint enabled or not.
- The texts of tasks, briefings, interactions and menus, as well as the names and pins given to entities.
- Routes given by a zone, locked map markers, and crews seated in their vehicles.
- The characters' outfits, and items stored through the "Inventory placement" setting.
- Playable factions. The "Save playable factions" box of the GTL Rules tab, ticked by default: on loading, players can spawn even with no Game Master connected. Essential with rotation or the server's automatic reload.
- Scenario settings: time, date, time flow, weather, wind, respawn (delay, tickets), arsenal — and those of mods that go through the scenario properties.
⚠ What does not survive: the contents of chests and vehicles, damage, and intel already gathered by the players.
Example. A night mission in the rain, with the US faction as the only playable one. The server restarts at 4 a.m.: the mission comes back at night, in the rain, the prisoners are still seated, the doors still locked, and players spawn straight on the US side without waiting for a Game Master to connect.